Why parking lot test rides tell you very little about How a full suspension mountain bike rides

I've been reminded over the last two days at Outdoor Demo at Interbike 2016 as to why just doing a parking lot test ride really tells you very little about how a full suspension bike actually rides on the trail. I'll give you two examples:

Example 1

In terms of climbing performance some high single pivot bikes actually feel quite good in parking lot rides since the slight lock out effect of the high pivot provides an efficient firm pedal feel. But when you actually get this type of bike on a trail, the slight lock out effect now becomes translated into pedal feedback and the bike hanging up on ledgy climbs, rocks and roots. Also over the course of a longer ride on dirt, the relative inefficiency of this type of suspension becomes more obvious.

Example 2

The other way to control suspension movement in active suspension designs that don't control bobbing and sag through the mechanical design of the suspension is to use shock damping. Generally this consists of compression damping to limit unwanted motion and perhaps also fast rebound damping to limit suspension sag when climbing. One bike that I rode in the last two days used this type of setup and felt surprisingly fast climbing on the road to the trailhead given how I knew its specific active suspension design typically reacts. Once I got on dirt, my perceptions changed 180 degrees and I could not WAIT to get off this bike. What happened?

Once this bike hit real-life rocks and other trail obstacles, the heavy compression damping caused the rear suspension to skip over rocks instead of absorbing them while what I thought might have been fast rebound damping was continually pogoing the bike down the trail. The bike was both difficult to control and tiring to ride even for the short amount of time that I was on the bike. From a parking lot test ride alone, you could have easily gotten the impression that this might be a great bike.

At Dirt Merchant Bikes, we stress the importance of actually getting on a bike to test out both fit and ride feel. Currently, we have Medium to X-Large Turner RFX demo bikes in stock and are looking into getting Turner Flux demo bikes as well. We do ride both the Turner bikes as well as competitor bikes to help us recommend the right bike for you, but we still think that getting you personally on a bike is invaluable. If you have any questions about this blog post or how we do demos, you can reach us at jeff@dirtmerchantbikes.com

Tips & Tricks for installing tubeless tires

I wanted to share some tips for mounting tubeless tires that I've learned from doing 4 tire comparison tests and mounting over 60 tires over the last year and a half:

Warnings:

  • I do not recommend inflating a tire over 40 psi when seating the tire beads.

  • Wear eye protection and hearing protection in case a tire blows off of a rim during installation

Installation Process:

  1. Clean the rim bed with alcohol to remove any trace of oil or grease. Tape tubeless-ready rims with tubeless tape and install valves onto the rim. Be as careful as you can to tape rims securely as losing air through improperly installed tape seems to be the most common cause of tubeless setups not being able to maintain tire pressure.

  2. Check the tire for markings that indicate direction of rotation before installing.

  3. Install the tire bead on one side of the tire onto the rim.

  4. Install the other tire bead ending at the valve. (The valve tends to allow less room for a tire bead leading to a tighter fit if you end away from the valve.)

  5. [If you only have a floor pump] Try to inflate the tire. If you can get the tire beads to form some level of seal with the rim bed, you'll be able to get the tire to hold air. From that point keep pumping fast(!) up to 35 psi. You'll generally hear a 'snap' as the tire beads seat at about 35 psi. I don't recommend going above 40 psi to reduce the risk of tire and/or bead blowouts. I've found that about 1/4 to 1/2 of tires install easily with just a floor pump.

    1. See tips and tricks below for ways to help the bead seat with just a floor pump

    2. See below for the tire brand/rim brand combinations that I've found install easier

    3. Warning: Be VERY careful not to exceed 40 psi in the tire to reduce the risk of tire and/or bead blowouts.

  6. [If you have access to a compressor or gas station air hose] The process of installing tubeless tires is a LOT easier with access to a compressor. The high pressure that a compressor can deliver quicker than a hand pump helps force tubeless tire beads against a rim bed from which you can then add air up to the tire pressure at which the tire beads will seat (about 35 psi).

    1. Warning: Be VERY careful not to exceed 40 psi in the tire to reduce the risk of tire and/or bead blowouts.

  7. Congratulations if you are up to this point. Getting the beads seated is the most challenging part of this process. To complete the installation you need to add sealant into the tire & distribute the sealant around the sidewalls of the tire.

  8. Let the air out of the tire. Generally the tire beads will remain seated on the rim.

  9. Remove the tire valve core. Generally tubeless valves will be of the presta variety, not the schraeder valves that are typically used with car tires)This is the top part of the presta valve that screws into the larger diameter base of the valve. You can do this by using a core removal tool such as the Stans NoTubes Core Remover Tool or an adjustable wrench if you don't have a core removal tool.

  10. Inject about 4 oz of tubeless sealant into the tire through the tire valve with the valve core removed

  11. Reinstall the valve core

  12. Pump up the tire to about 35 psi

  13. Shake the wheel/tire laterally to distribute sealant onto the tire sidewalls. Rotate the wheel/tire as you continue to do this around the entire tire.

  14. Rotate the wheel/tire held horizontally to allow sealant to work its way into the junction between tire bead & rim. Set the wheel/tire down horizontally for 5-10 minutes. A cardboard box is a good way to keep the wheel/tire level. Flip the wheel over to the other side and repeat this process. Losing air due to tire beads not being adequately sealed against a rim is another common cause of tubeless setups not being able to hold pressure.

  15. Adjust tire pressure based on your weight. This is a formula from Stans NoTubes that provides a starting point for matching tire pressure to your weight:

Rider weight / 7 = X  

Front pressure = X -1 psi
Rear pressure = X -2 psi

Example based on a rider weight (with gear) of 160 lbs
160 lbs / 7 = 22.9
Front pressure = 22.9 - 1 = about 22 psi
Rear pressure = 22.9 + 2 = about 25 psi


Tips & Tricks:

  • Use rims designed for tubeless use: Tubeless rims have a ridge next to the bead seat that will help to "lock" a tubeless tire's bead onto the rim after it is seated. I personally will not do tubeless "conversions" with non-tubeless rims. Non-tubeless rims that don't have the ridge to help lock in a tubeless tire's bead greatly increase the risk of burping (losing air in hard cornering) or rolling a tire off in corners.

  • Use tires designed for tubeless use: Tires designed for tubeless mounting have a casing that is more likely to be air tight as well as tighter fitting beads (keep reading for the benefits of tighter fitting beads for ease of tubeless installation).

  • Seat the tire beads before adding sealant: Trying to seat a tire that already has sealant added just adds potential for messiness. The sealant does not help the initial bead seating process.

  • Seating the tire beads with just a floor pump: If a tire's bead fit snugly against the rim bed, you have a good chance of being able to just use a floor pump to get enough air pressure to seat the beads. An air tight seal between bead and rim allows you to gradually build up enough air pressure in the tire until the beads seat around 35-40 psi.

  • Tricks for seating tire beads when a tire doesn't start holding air pressure immediately:

    • Make sure the tire is covering the valve hole

    • Try to move the tire so that the beads press against the rim bed

    • Use an inner tube to strap the tire against the rim

  • Seating the bead without a compressor: A inexpensive way to get a high volume of air into a tire at high velocity is to use a gas station air compressor. If you have Presta valve, you will need a presta-to-schrader valve adaptor such as the Slime 23042 Presta to Schrader Valve Adapter. The high velocity of air that is delivered by this method or with a compressor pushes the tire beads against the rim allowing pressure to build up to seat the beads.

    • Warning: Be VERY careful not to exceed 40 psi in the tire to reduce the risk of tire and/or bead blowouts.

  • Add sealant via a tubeless valve that has a removable valve core: Many instructional videos will recommend removing one side of the bead at this time to add sealant. I don't agree with this approach. You've done a lot of work at this point to get both tire beads seated properly. Why would you want to undo part of the work you've done to seat the beads? Adding sealant through the valve core is by far the lowest effort way to add sealant.

  • For really hard to seat tires, pulling the tire bead on top of the rim could be worth trying: I just learned this new method of getting a better seal between tire and rim to do the initial inflation & seating of the bead if you don’t have access to a compressor or tubeless charger pumps that can deliver a high volume blast of air. The basis of this technique is that you pull the tire bead on top of the rim with a tire lever. When you get to about 40-50% of the tire bead resting on top of the rim. you put your thumb on the tire bead so it doesn’t slip off of the rim and gently pull out the tire lever. Repeat on the other side and pull the bead up on the rim as far as you can go. Proceed to inflate the tire. Once you are able to get some pressure in the tire. There seems to be at least some risk of having the tire bead blow off the rim when you inflate the tire, so be aware of that and try this technique at your own risk. You can see the technique being used at: https://youtu.be/tE3h4nmDdOo.

  • Easier to install tire brand/rim brand combinations

    • On Stans rims (Easton & DT rims have a similar diameter. Mavic & WTB have a slightly smaller diameter)

      • Schwalbe Snakeskin - Easiest

      • Maxxis Exo - Fairly Easy

      • Specialized 2Bliss - Fairly Easy

      • Continental Protection - Difficult to do initial seating of the beads on Stans rims

      • WTB TCS - CAN work but beads may be tight as the bead diameter is based on the tighter UST bead specification. I have mounted 2 WTB tires on Stans rims, but have heard that others have had challenges with this. Works better on WTB and Mavic rims.

      • Michelin, Hutchinson - I don't have direct experience but I believe these brands will work better on WTB and Mavic rims.

This is a great video on installing difficult-to-mount tubeless tires:

Our Picks for the Best Tubeless Setup Products

You can help support Dirt Merchant Bikes’ product testing by purchasing through our retail partners.

Orange Seal Tubeless Sealant

Our experience is that Orange Seal seals punctures quickly and consistently. The amount of rain we get in the PNW makes sealants drying out less of an issue, but Orange Seal also resists water absorption well.


Stan’s Tubeless Rim Tape

Stan’s tape has a little stretch that helps in removing air bubbles when taping rims. It sticks well to most alloy rims and some carbon rims. It also removes cleanly unlike Gorilla Tape.


Stan’s Tubeless Valve Stems

Stan’s valves have a solid rubber base that helps reduce air leaks around the valve base. Tightening the locknut helps seal tape against the rim.


Diamondback Steel Core Tire Levers

It can be helpful to use a tire lever to get the last part of a tire bead onto a rim. Plastic tire levers don’t last long with that type of abuse. I like these better than the more expensive Park Tool TL-6.2 Steel Core Tire Levers because the entire tip of the lever is covered in plastic to reduce the chance of scratching a rim.


Larger Sizes of Sealant & Tubeless Tape


Initial Ride Impressions: New Schwalbe Fat Albert Front & Rear Tires REVIEWED

New 2016 Schwalbe Fat Albert – Front & Rear: Initial Ride Impressions

I’ve had a few rides on the new front and rear specific Fat Albert tires from Schwalbe. Given the unconventional tread design, I’ve had both curiosity and doubts about how well the tires would work for our Pacific Northwest trail conditions.

Schwalbe Fat Albert Front

Schwalbe Fat Albert Rear


Key questions that I had about these tires after seeing them at Interbike 2015 last September were:

Front:

1.       How well would these brake in a straight line given that there is no flat braking surface as you might see on a Maxxis High Roller II or DH-R II?

2.       How stable would braking with these tires be in a straight line?

3.       How much cornering grip would this tire have?

Rear:

1.       How well would these tires roll?

2.       How much cornering grip would these tires have with rounded side knobs and intermediate knobs?

The short answer is that the Fat Albert Front performs surprisingly well and is especially good in certain situations.  Cornering traction on the Fat Albert front seems as good or better than a Maxxis DH-F which was the top pick in our recent comparison test of enduro tires: Dirt Merchant Bikes' Spring 2016 Enduro Tire Comparison Test: Maxxis DH-F/DH-R vs Specialized Butcher/Purgatory vs Schwalbe Hans Dampf/Nobby Nic.

I am, however, quite confused about the design intent of the Fat Albert Rear and how its characteristics match up with the needs of potential target rider groups.

Test Parameters:

·       Trail Conditions: Trails were slightly damp from rain coming down a day before. Traction conditions were relatively high

·       Tire Pressures:

o   Front: 22 psi

o   Rear: 26 psi

Fat Albert Front Tire Impressions:

1.       How well would these brake in a straight line given that there is no flat braking surface as you might see on a Maxxis High Roller II or DH-R II?

The Fat Alberts had decent braking traction, though perhaps not as rock solid as a High Roller II or a Magic Mary under heavy braking pressure.

2.       How stable would braking with these tires be in a straight line?

I thought the front tire might tend to wander under heavy braking in a straight line due to the lack of a flat braking surface. Based on my riding experience, this wasn’t a problem at all.

3.       How much cornering grip would this tire have?

Cornering grip was quite good. An unexpected side benefit was the ability of the tire to change direction during hard cornering. In contrast, the High Roller II has a very solid edge feel but tends to be on-or-off in its cornering grip. The new Fat Albert Front provides much better ability to change lines during hard cornering.

4.       Other strengths

The Fat Albert Front was also especially good at braking while cornering. My guess would be that any three knobs on one side of the tire form a stable tripod for braking when the tire is leaned over.

Fat Albert Rear Tire Impressions:

I’m going to convey my impressions of the Fat Albert Rear Tire before explaining my confusion about the design of this tire:

1.       How well would these tires roll?

Rolling resistance is about average and feels higher than that of a Maxxis DH-R II and much higher than a Nobby Nic.

2.       How much cornering grip would these tires have with rounded side knobs and intermediate knobs?

Cornering grip is not that good, but it tends to slide predictably. The intermediate knobs may be preventing the side cornering knobs from digging in as firmly as would be ideal. The Maxxis DH-R II has more cornering grip while the Schwalbe Nobby Nic seems to have about the same level of cornering grip.

3.       Other strengths

Climbing traction seems good, but I generally don’t find that climbing traction is at as much of a premium as cornering grip. Braking traction is generally good.

Though the new Fat Albert Rear tire has some strengths, I am confused about the benefits of the tire for the usage profiles of likely user groups. As a design researcher focused on driving product innovation by looking at customer needs/attitudes, I typically start thinking of new product concepts or product refinement based on how products might better fit users’ needs and preferences. For a more robust, traction oriented tire such as the new Fat Albert, I can think of two potential user groups:

·       Enduro/All-mountain riders focused on grip for downhill cornering and braking, and

·       Trail riders with a need for a balance of lower rolling resistance with reasonable good cornering and braking ability

I don’t think the Fat Albert Rear tire fits the needs of either of these user groups:

1.       Enduro/All-mountain riders:

a.       Needs: Cornering grip, Braking traction to maximize DH speed and control

b.      Fit with the new Fat Albert Rear:

i.      Cornering Grip: For this group of riders, cornering grip would be lower than ideal.

  ii.      Climbing Traction: The Fat Albert’s climbing traction is good to have, but not essential as the focus for these riders is downhill speed, stability and predictability

  iii.      Braking Traction: OK

c.       My Recommendation for ideal rear tire: Maxxis DH-R II that provides better cornering grip and braking traction along lower rolling resistance than the new Fat Albert Rear tire provides.

2.       Trail riders:

a.       Needs: Lower rolling resistance that reduces energy expenditure for longer rides while not compromising cornering and braking ability.

b.      Fit with the new Fat Albert Rear:

 i.      Rolling Resistance: Rolling resistance of the new Fat Albert is higher than I would like for a tire that I might ride for longer rides

 ii.      Cornering Grip: The level of cornering grip is reasonable and the tire slides predictably

iii.      Climbing Traction: The Fat Albert’s climbing traction is good to have, but it seems that the design of this tire has prioritized climbing traction at the expense of rolling resistance.

c.       My Recommendation for ideal rear tire: Schwalbe Nobby Nic that provides significantly lower rolling resistance along with cornering grip and climbing traction that is comparable to the new Fat Albert Rear tire.

Summary:

I like the new Fat Albert Front tire a lot and will keep riding it for a while to get more experience with how it compares to the Maxxis DH-F. The focus on climbing traction for the new Fat Albert Rear tire does not make sense to me especially given that this comes at the expense of markedly higher rolling resistance than the other rear tires I have recommended. I will likely be swapping out the Fat Albert


How is the Maxxis DH-F 2.5 Wide Trail tire tread pattern different than the 2.3 version?

The new Maxxis Wide Trail tires are, of course, wider than their regular sized siblings, but how does the tread pattern differ? I have both the DH-F 2.3 and 2.5 in stock so I decided to take some pictures and measurements.

Overall, the side knobs on the Wide Trail version are closer to the center knobs, but the overall width of the knobs is 5mm wider.

2.3 (left) and 2.5 (right) side-by-side:


2.3: Center to Side Lug Spacing is 5.5 to 6mm


2.5: Center & Side Lug Spacing is 4.5 mm


2.3: Knob width is 55mm


2.5: Knob width is 60mm

Pacific Northwest Spring 2016 Enduro Tire Test: Hans Dampf/Nobby Nic, DHF/DHR, Butcher/ Purgatory REVIEWED

Dirt Merchant Bikes

Spring 2016 Enduro Tire Comparison Test


About Dirt Merchant Bikes:

Dirt Merchant Bike conducts testing to help us determine which products will work best for our customers and their riding style. We are the exclusive Seattle/Tacoma area dealer for Turner Bikes and have the new Turner RFX available for demo at Duthie Hill Park in Issaquah, WA

(http://www.dirtmerchantbikes.com/demos)


Testing Overview:


Our Winter tire comparison test sessions conducted last November & January established the Schwalbe Hans Dampf 2.25 and Schwalbe Nobby Nic 2.25 (2015 version) as our front and rear tire benchmarks for Pacific Northwest wet winter conditions.  The links to these reports are located at:


        Winter 2015 Comparison Test 1: http://www.dirtmerchantbikes.com/special-events/2014/11/20/tire-comparison-test-report-2015-nobby-nic-high-roller-ii-neo-moto-hans-dampf

        Winter 2015 Comparison Test 2: http://www.dirtmerchantbikes.com/special-events/2015/1/15/pacific-northwest-winter-tire-comparison-test-session-2-2015-nobby-nic-mountain-king-ii-trail-king-vigilantetrail-boss-magic-mary-hans-dampf


In this latest tire comparison test, we tested wider tires in the following tire combinations:


1. Maxxis Minion DH-F 2.3 3C MaxxTerra (f) / Maxxis Minion 2.3 MaxxTerra DH-R (r)

2. Specialized Butcher 2.3 GRID 2Bliss Ready (f) / Specialized Purgatory 2.3 GRID 2Bliss Ready (r)

3. Schwalbe Hans Dampf 2.35 Evo Trailstar (f) /Schwalbe Nobby Nic 2.35 Evo Pacestar (r)


Before testing, we expected all of the tires chosen for this comparison to be strong contenders:


Schwalbe Hans Dampf/Nobby Nic: The Hans Dampf and Nobby Nic tires are wider versions of the tires that have tested well in our prior comparisons. The Hans Dampf in this test is also in the Trailstar compound which should yield better cornering traction than the Pacestar compound on our previously tested Hans Dampf front tires.


Maxxis DHF/DHR: The Minion DHF has been a long time favorite of many riders both in the Pacific Northwest and elsewhere so we expected the DHF to be a strong contender in this comparison. The DHR has also built a strong reputation both as a rear tire and as a front tire when good braking is a desired quality.


Specialized Butcher/Purgatory: Finally, the Butcher was of interest due to its similar tread design to the well-regarded DH-F and because it has also attracted a loyal following of riders. Paired with the Butcher is the Specialized Purgatory as Specialized’s rear tire offering for all mountain riding.


Product testers included 2 riders recruited from the Seattle area via a Facebook posting and myself.  Each of the test riders rode either a Turner RFX (160mm of travel) for the duration of the comparison test.  Each rider rode the three tires combinations both uphill and downhill.    Tires/wheels were switched to the next rider after an uphill/downhill loop so that test riders rode each of the tire combinations once.


Tires Combinations Tested:


Maxxis Minion DH-F (front) & DH-R II (rear)


Maxxis Minion DH-F 3C MaxxTerra, EXO,  27.5” x 2.3,

        Claimed Weight: 870 g

        Actual Weight: 870 g

        Tire Height: 52 mm

        Casing Width: 58 mm

        Knob Width: 56 mm


Maxxis Minion DH-R II 3C MaxxTerra, EXO,  27.5” x 2.3

        Claimed Weight: 805 g

        Actual Weight: 820 g

        Tire Height: 54  mm

        Casing Width: 56 mm

        Knob Width: 57 mm


Specialized Butcher (front) & Purgatory (rear)


 Specialized Butcher GRID 2Bliss Ready,  27.5” x 2.3

        Claimed Weight: 930 g

        Actual Weight: 930 g

        Tire Height: 57 mm

        Casing Width: 58 mm

        Knob Width: 57 mm


 Specialized Purgatory GRID 2Bliss Ready,  27.5” x 2.3

        Claimed Weight: 755 g

        Actual Weight: 720 g

        Tire Height: 56 mm

        Casing Width: 58mm

        Knob Width: 57 mm


Schwalbe Hans Dampf (front) & Nobby Nic (rear)


Schwalbe Hans Dampf, Trailstar/Evo/Snakeskin 27.5” x 2.35

        Claimed Weight: 795 g

        Actual Weight: 860 g

        Tire Height: 57 mm

        Casing Width: 60 mm

        Knob Width: 62 mm


Schwalbe Nobby Nic, Pacestar/Evo/Snakeskin 27.5” x 2.35

        Claimed Weight: 720 g

        Actual Weight: 715 g (avg of 2 tires weighed with a range of 710-720 g)

        Tire Height: 57 mm

        Casing Width: 60 mm

        Knob Width: 58 mm


Testing Methodology:


Location: Grand Ridge Trail in Issaquah, WA going southbound after the boardwalk. The climb/descent has a 200 foot vertical gain.  Grade on the incline ranges from 6-16 percent.  One-way distance is 0.75 miles (1.5 miles for the round trip).


Trail Conditions: The weather was clear.  The trail had not had significant precipitation for a week providing high traction conditions.  The test riders experienced no problems with rear tire traction overall, but front tire traction was more important with a good number of higher-speed turns as the trail traverses across the fall line. 


Product Testers: Test riders were myself & 2 other riders that had signed on to be product testers with Dirt Merchant Bikes.  All test riders were competent climbers & descenders with some faster on the uphills and some faster on the downhills.  The number of climbs completed during the course of the comparison test were well within the stamina limits of the recruited testers.


Test Bikes: The testers rode a Turner RFX (160mm travel).   Each rider rode the same bike for all 3 tire combinations tested. (Tires/wheels were switched between bikes)

Wheel setup: Stans Flow EX rims (25 mm internal width) on DT350 hubs.  Tires were run tubeless with 30 psi. 30 psi was the lowest pressure that I was comfortable running with rider weights varying within an 80 lb range.

Testing Procedure:  Each rider rode each of the 3 tire combinations up the course and then back down.  Wheels/Tires were changed after each uphill/downhill round trip.


Evaluation Methodology: The tire combinations were evaluated on the basis of three separate measures:


        Quantitative Rating: Tire combinations were rated on multiple quantitative factors on a 1-5 scale with 5 being the best score, 3 being an average score and 1 being far below expectations. The average quantitative rating was calculated as an average of the 5 individual rider scores on each attribute.

        5 stars - Absolutely outstanding

        4 stars

        3 stars - Solid performance, meets expectations

        2 stars

        1 star - Misses expectations by a wide margin


        Subjective Evaluation: Test riders added subjective comments to the Quantitative Ratings to provide deeper insight into the quant ratings.


        1st & 2nd most Preferred Tires: Each test rider indicated which tire would be their 1st and 2nd pick for front and for rear usage.


        Timed Laps: Due to the data collection methodology introducing unintentional variability into the data, we will run further testing to get lap times for the tire combinations that performed better on the three evaluations mentioned above. The lap times that we will collect are as follows:

        Uphill split

        Downhill split

        Total Time (aggregating Uphill & Downhill lap times)


Notes on Interpretation of Results: 


I suggest reviewing the subjective comments in conjunction with the quantitative data for a general understanding of each tire’s strength/weaknesses.  Please note the following caveats when interpreting the results from this comparison test.


        This is not intended to be a scientific test:  Though this test includes quantitative data, the numerical data is intended only to help interpret rider feedback.


        Differences between tires in the quantitative results are not statistically significant: With only small sample of three riders rating each tire, differences in quantitative ratings should be interpreted as directional and not as statistically significant differences.


        Projectability of results to other Trail conditions: This comparison test was conducted in the Seattle area in April 2016.  Precipitation about 4 days before testing provided firm, high traction trail conditions.  Perceptions of tire performance generated from this test are generally not projectable to dissimilar trail conditions in other geographic areas.


Performance Ratings – Front Tire:  

Subjective Comments – Front Tire


Schwalbe Hans Dampf 2.35, Trailstar compound, Snakeskin casing (as a front tire):

Summary:  Coming into this test, we expected high cornering traction from the Hans Dampf based on prior experience with the narrower, harder Pacestar compound version. Perhaps given the exceptional performance of the other tires tested, the Hans Dampf failed to provide as much confidence in cornering as we might have expected. The Hans Dampf communicated steering feel well but felt less solid at cornering limits than the other tires tested.


Strengths:

        Steering Feel was good: “Most steering feedback of the tires tested”


Weaknesses:

        Traction limits were lower than other tires tested: “Loose in corners.”

        Cornering felt less solid than on other tires tested: “Not as solid feeling as the DH-F when cornering hard.”


Specialized Butcher 2.3, GRID 2Bliss Ready (as a front tire):

Summary: The Butcher had decent cornering traction, but did not feel as sharp on turn-in as the DH-F or the Hans Dampf. The Butcher’s cornering traction was also somewhat difficult to access as the tire was limited in the amount of feedback that it provided on available cornering grip.


Strengths:

        Good cornering grip: “Grip felt more solid than the Hans Dampf”


Weaknesses:

        Turn-in was less sharp than the other tires tested: “Did not feel sharp on turn in”

        Less predictable at cornering limits: “Couldn’t get a good sense of when the tire might lose traction.”

        Felt less responsive than the other tires: “Didn’t provide much feedback about what was going on at the tread level”


Maxxis Minion DH-F, 27.5” x 2.3, 3C MaxxTerra Compound, EXO Casing (as a front tire):

Summary: The DH-F was clearly a notch above the other two tires tested in terms of both cornering grip as well as predictability at the limit. Good feedback about available traction made the DH-F easy to ride hard and confidence inspiring.


Strengths:

        High Cornering Traction: “Felt locked in" “Very solid feeling when on the cornering knobs.”

        Very predictable at the limit: “Feels very solid at the limit”, “Stable, predictable and Most confidence inspiring”


Performance Ratings – Rear Tire:  

Subjective Comments – Rear Tire


Specialized Purgatory 2.3, GRID 2Bliss Ready (as a rear tire):

Summary: The Purgatory was a decent tire overall, but failed to excel in either rolling resistance or traction among this group of high-achieving tires.


Weaknesses:

        Higher Rolling Resistance: “Felt slower than the other tires tested”

        Cornering grip felt less secure: “A bit skittish on tight loose corners under braking.” “Grip felt tenuous””

        Lacked feedback:  “Couldn't get a good feel for when the tire was close to its cornering limits”


Schwalbe Nobby Nic 2.35, Trailstar compound, Snakeskin casing (as a rear tire):

Summary: The Nobby Nic had reasonable levels of climbing and cornering traction, but felt like the fastest rolling tire in the test.


Strengths:

        Rolling Resistance: “Seemed Fast” “Rolled Fastest”

        Good handling feel: “Better cornering feel than the DH-R”

        Good ride feel: “Lively, fast rolling feel”


Weaknesses:

        Climbing Traction: “Not as secure as the DH-R” “Good at least in the dry conditions of the test”

        Cornering Grip was not exceptional: “Did tend to wash out in faster corners” “A bit skittish in tight loose corners under braking”


Maxxis Minion DH-R, 27.5” x 2.3, 3C MaxxTerra Compound, Exo Casing(as a rear tire):

Summary: Though its performance was not dominant to the same degree that the DH-F was for the front tire comparison, the DH-R was the best in the test at balancing the traction with reasonable rolling resistance.


Strengths:

        Good Climbing Traction: “No loss of traction at all”

        Surprisingly good rolling resistance: “Rolled surprisingly well for an aggressively treaded tire”


Weaknesses:

        Cornering Grip was good, but not head: “Lost rear tire grip once or twice”


Test Summary:

Front Tire Preference:

Rear Tire Preference:

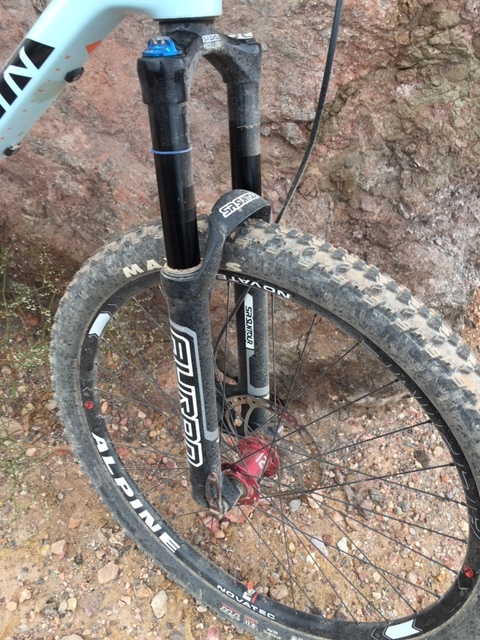
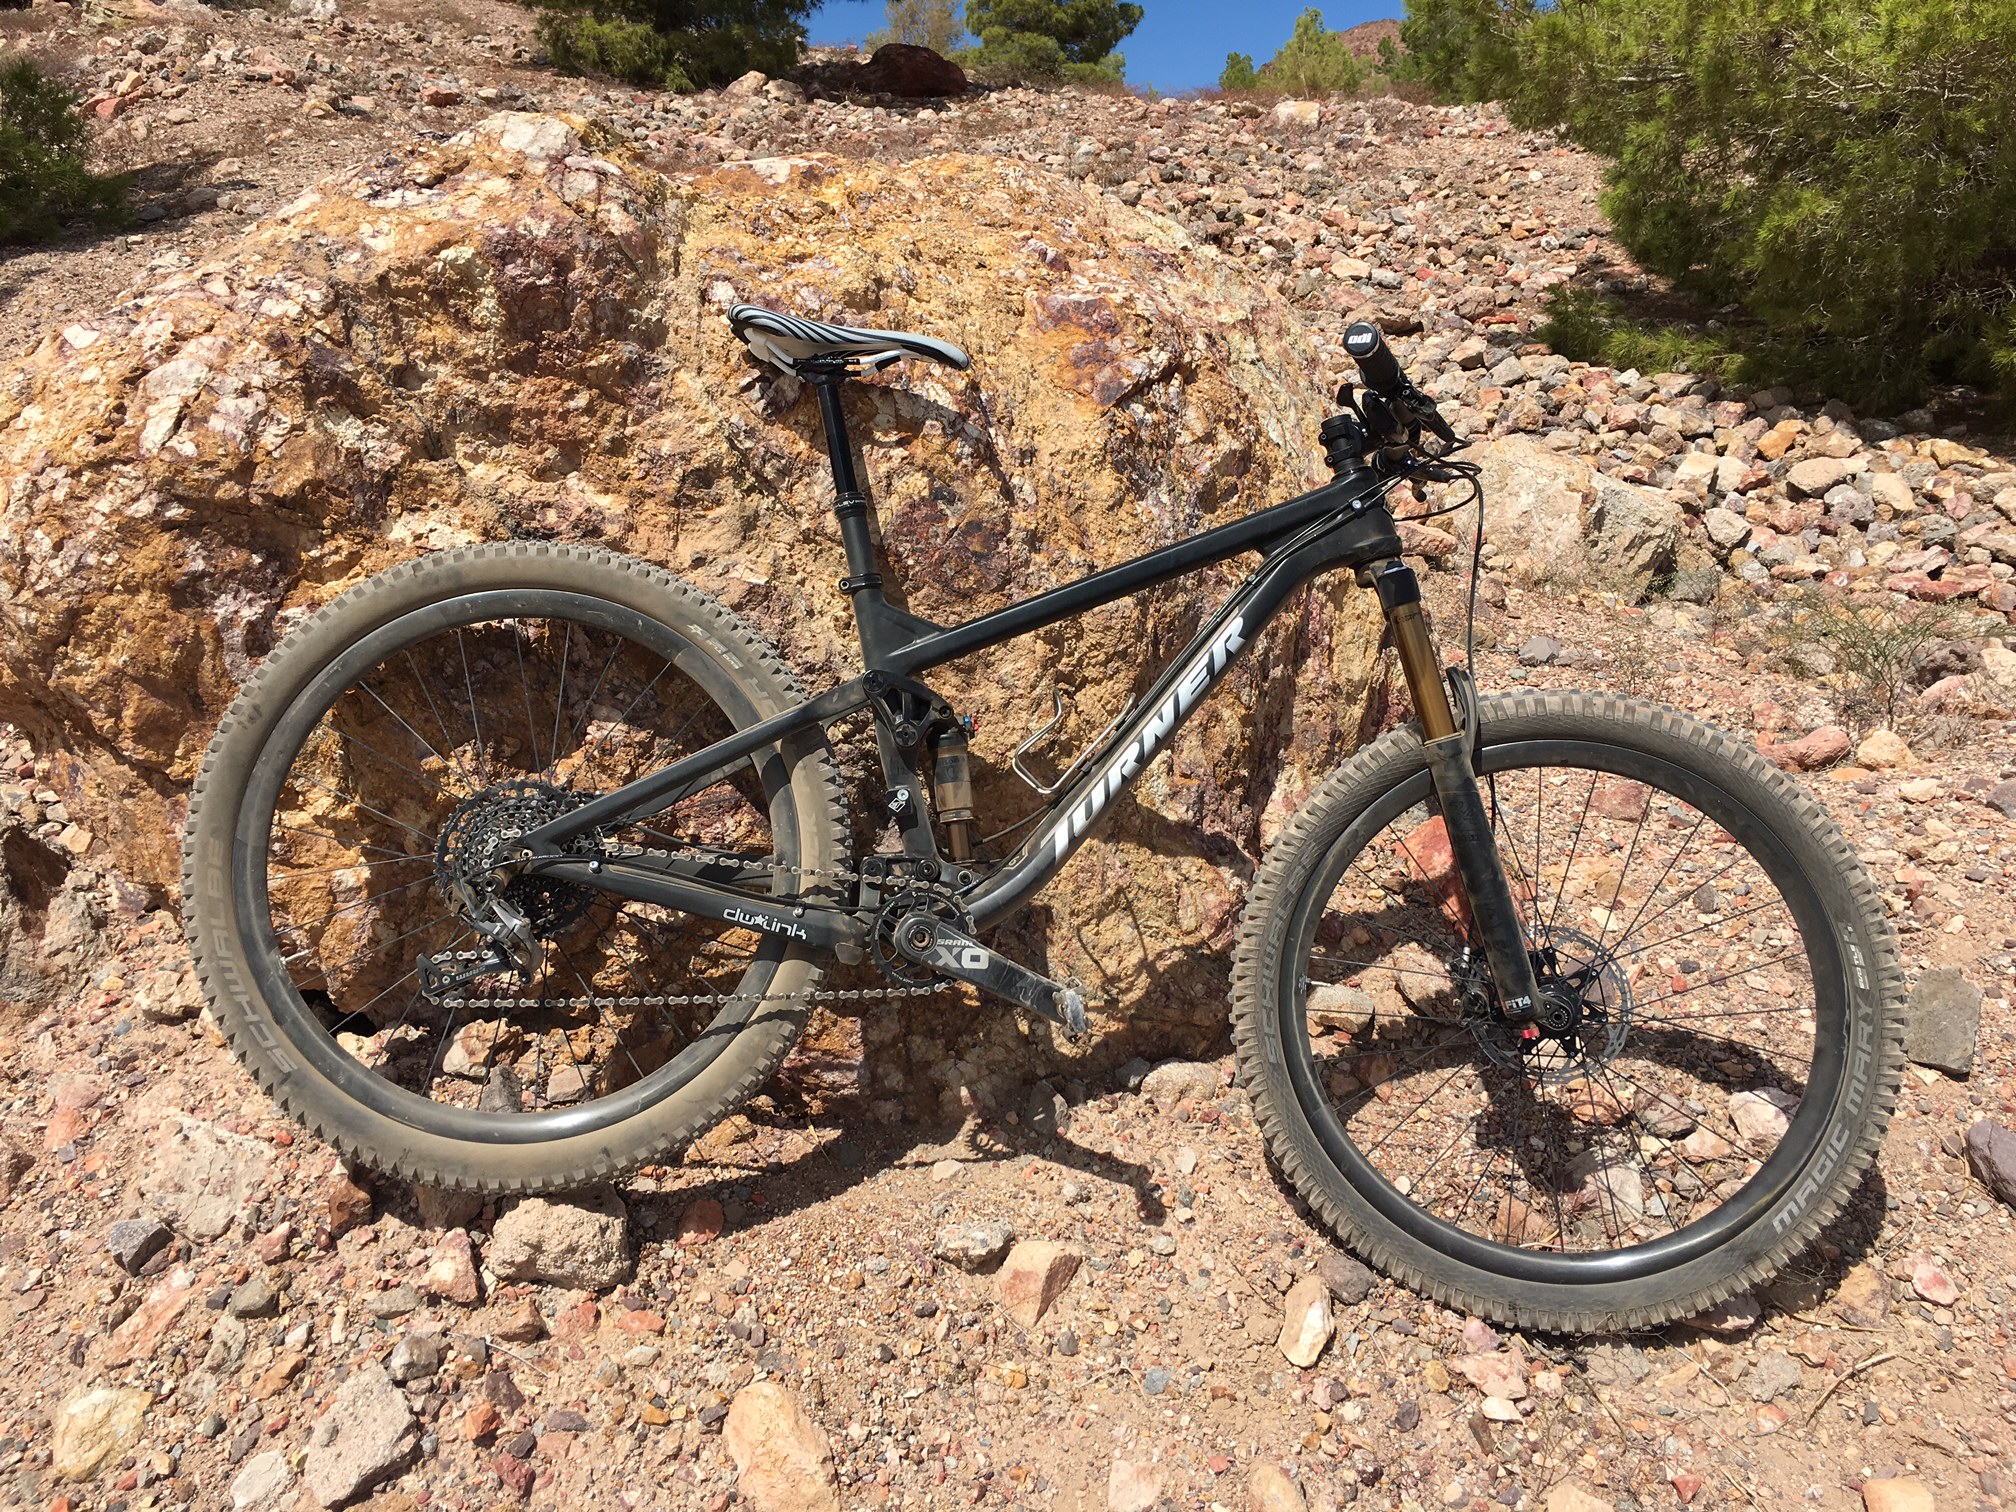
All of the tires chosen for this test were known to be strong performers and this was supported by our testing experience on these tires. What this test is looking to convey is the relative strengths and weaknesses of the tested tires. Overall, the testers seemed to prefer tires that were able to best balance multiple performance characteristics. The fundamental performance attributes common to all of the more preferred tires were good cornering traction and predictable steering/handling for front tires and a balance of rolling resistance with good climbing traction for rear tires. 


Front Tire Summary:


In our Summer 2015 XC tire test (http://www.dirtmerchantbikes.com/special-events/2015/7/19/pacific-northwest-summer-2015-xc-tire-comparison-test), we had introduced the idea of Usable Rolling Resistance. The idea was that the fastest XC/Race tires are those that combine low rolling resistance with sufficient climbing traction to not lose efficiency from tires spinning out on climbs. For front tires, there is perhaps a similar paradigm in which Usable Cornering Grip in which the perceived cornering ability of a tire is the result of both its absolute cornering traction limits and the level of feedback on traction limits that tire provides to help riders access more of its available traction.


This concept of Usable Cornering Grip was reflected in the test riders’ tire preferences that favored tires that provided both high levels of cornering grip with the steering feel/handling to be able access more of this available grip. Steering feel and good feedback on how much traction is available was almost as important as absolute cornering grip.


The DH-F was clearly the best front tire in the test providing high cornering grip with good steering feel and predictable handling at the limit. Unlike some other front tires with high levels of cornering traction that we’ve previously tested, the DH-F also provides a high degree of steering feel providing clear indications of when the tire is about to slide. Some other tires that we’ve previously tested have had high cornering traction, but were less communicative about the limits of that traction.


It was surprising that the Butcher was the least preferred of the three front tires tested, as it was rated higher than the Hans Dampf on all four front tire rating factors. The best explanation that I can give for this result is that compared to the Butcher, the Hans Dampf has a more communicative steering feel which riders appreciated. The Butcher tended to have a softer initial turn-in feel and was a bit more disconnected feeling when approaching cornering limits. This hampered test riders’ ability to maximize the Butcher’s reasonably high cornering traction.


The Hans Dampf provided a lively ride and cornering feel, but was let down by having lower overall cornering traction than the Butcher or the DH-F. The Hans Dampf certainly is an entertaining tire to ride when compared in isolation, but the DH-F provides only slightly less steering response with a more solid cornering feel.


Rear Tire Summary:


The performance of the rear tires compared in this test was closer than the results for the front tire comparison. Of the three tires tested, the Purgatory was perhaps the weakest with the highest perceived rolling resistance, lower cornering traction limits, and less communication from the tread about available traction. The Nobby Nic provided reasonable levels of climbing and cornering traction, but excelled in rolling resistance and handling feel. Having a Nobby Nic as rear tire provides an enjoyably lively and fast rolling feel that seems to be characteristic of Schwalbe tires (with the exception of the Magic Mary and other more DH-oriented tires). The DH-R had the best balance of traction and rolling resistance. Even with an aggressive tread design, the DH-R rolled surprisingly well. On balance, the testers all picked the DH-R as their number one choice for rear tire.


In deciding between the DH-R and the Nobby Nic, the DH-R is the best all-around choice when a higher level of rear tire cornering and climbing traction is desired. Note though that all three of these tires provide a high level of climbing traction so choice is really between a high level of climbing traction and the best climbing traction available. The Nobby Nic is potentially a good choice for riders that are seeking to have their bikes feel and be faster. More front tire cornering traction is generally always beneficial, but for rear tires, rolling resistance is as important of a consideration as cornering traction


Additional Considerations:


Ease of Tubeless Setup by Brand:

[Caveat: This is on Stans Flow EX rims so certain brands may happen to match better with the rim diameter and profile of these rims.  In particular, WTB TCS beads are known to be a tighter fit, though my experience has been that I’ve had no issues mounting a WTB Vigilante and a WTB Trail Boss on Arch EX rims. Your experience will likely vary with different rim brands/models.]

Schwalbe: Consistently, Schwalbe tires used in our tests have been the easiest to set up tubeless on the Stans Arch EX rims with 15 of the 17 Schwalbe tires we have mounted in our three comparison tests seating with only a floor pump and no additional manipulation beyond just mounting the tire and airing it up.  About 2/3 of the Schwalbe tires held air even without sealant and all tires held air after doing a shake and distribution of sealant.


Continental: Of the 6 Continental tires that we have mounted, only 1 of the 6 seated easily with a floor pump, 4 required additional manipulation to seat and I gave up on seating one by hand (and went to the gas station to use their air compressor). All of the Continental tires lost air pressure over time until I did a second shake and distribution of sealant to seal the bead interface.


Maxxis: 5 of the 6 Maxxis tires that we have tested seated easily with a floor pump and 1 required some additional manipulation to seat with a floor pump. 3 of the 4 tires held air after doing a shake and distribution of sealant and the remaining tire also held air after a second shake and distribution of sealant.


Specialized: 2 of the 2 Specialized tires that we have tested seated easily with a floor pump. Both of the tires held air after doing a shake and distribution of sealant. Also, kudos to Specialized for the bead design on their 2Bliss tubeless ready tires. The two Specialized tires tested with the 2Bliss design have butyl rubber coated tire beads which promotes a more airtight seal between tire and rim after tires are mounted onto a rim but before seating of the tire beads. Seating a tubeless tire with a hand pump requires the tires to have a sufficiently airtight seal with a rim to be able to use air pressure to seat the tire bead. The butyl rubber coating the 2Bliss tire beads helps create this level of seal between tire and rim.

Previous Editions of our Tire Testing Reports:

If you’re interested in reading previous editions of our tire testing reports, they are located at:

Winter 2015 – Enduro/Trail Tire Comparison Test 1: http://www.dirtmerchantbikes.com/special-events/2014/11/20/tire-comparison-test-report-2015-nobby-nic-high-roller-ii-neo-moto-hans-dampf

Winter 2015 – Enduro/Trail Tire Comparison Test 2: http://www.dirtmerchantbikes.com/special-events/2015/1/15/pacific-northwest-winter-tire-comparison-test-session-2-2015-nobby-nic-mountain-king-ii-trail-king-vigilantetrail-boss-magic-mary-hans-dampf


Summer 2015 – XC Tire Comparison Test: http://www.dirtmerchantbikes.com/special-events/2015/7/19/pacific-northwest-summer-2015-xc-tire-comparison-test


Tires slated for testing in Summer 2016 & Winter 2017:

Our tire testing plan for the rest of 2016 is as follows:


June 2016:


Dry Conditions XC or Race Tire testing – TBD based on reader interest

Benchmark: Schwalbe Rocket Ron 2.25 (front & rear)

Other tires considered for inclusion: Schwalbe Racing Ralph, Maxxis Ardent Race, Vredestein Black Panther XTRAC, Continental Race King

-- or –

Dry Conditions Semi-Slick Rear Tire testing – TBD based on reader interest

Benchmark: Maxxis DH-F (front)

Rear tires considered for inclusion: Maxxis Minion SS, Specialized Slaughter, Maxxis Tomahawk, Schwalbe Rock Razor, WTB Riddler


November 2016: Wet Conditions Enduro/Trail Tire testing –

Benchmark: Maxxis DH-F (front) / Maxxis DH-R or Schwalble Nobby Nic (rear)

Other tires considered for inclusion: the new e*thirteen TRS Race (https://bythehive.com/pages/tires), Bontrager SE5, Michelin Wild Rock’R/Wild Grip’R, Schwalbe Fat Albert Front & Fat Albert Rear, Schwalbe Magic Mary, Maxxis Aggressor


Please feel free to reach out to Dirt Merchant Bikes by e-mail at jeff@dirtmerchantbikes.com with your preferences for tires to test.


Tires that we carry

Based on the results of our two recent tire comparison tests, Dirt Merchant Bikes will be carrying the Schwalbe Rocket Ron tires in addition to the Nobby Nic, Hans Dampf and Magic Mary in all wheel sizes and widths for the summer riding season. We will also carry Maxxis DH-F/DH-R, High Roller II, and Ardent tires as a value priced option.


The Schwalbe tires that we carry & our pricing is:

Schwalbe Nobby Nic (new HS 463 version) Evolution Line –26”, 27.5” & 29” tire sizes: Regularly $67.99, 

Schwalbe Rocket Ron Evolution Line –26”, 27.5” & 29” tire sizes: Regularly $67.99, 

Schwalbe Magic Mary Evolution Line –26” & 27.5” tire sizes: Regularly $67.99, 

Schwalbe Hans Dampf Evolution Line – 26”, 27.5” & 29” tire sizes: Regularly $67.99,

Typically, we will have the Pacestar (normal) and Trailstar (soft) compounds with Snakeskin/TL-Easy casing in stock with VertStar (softest compound) available to ship in 2 days.


The Maxxis tires that we carry & our pricing is:

Maxxis Minion DH-F 3C MaxxTerra EXO/TR

·       27.5 x 2.3: $62.99

·       27.5 x 2.5 Wide Trail: $63.99

Maxxis Minion DH-R 3C MaxxTerra EXO/TR

·       27.5 x 2.3: $62.99

·       27.5 x 2.4 Wide Trail: $63.99


Ordering Tires:

Tires can be ordered from Dirt Merchant Bikes at: http://www.dirtmerchantbikes.com/tires-wheels/


We also welcome any other requests/suggestions for our tire testing program. If you have any questions/comments about this tire comparison test or questions about tires, please e-mail Dirt Merchant Bikes at jeff@dirtmerchantbikes.com


Product Review: 2016 SR Suntour XCR Air 24" Fork

XCR Air 24 Fork Review

          2016 version of the XCR Air 24 fork with newly updated graphics

          2016 version of the XCR Air 24 fork with newly updated graphics

Dirt Merchant Bikes has an XCR Air 24 fork available for demo in the Seattle area.

Contact us at 425.429.0865 for details and to reserve a demo.


For 2016, SR Suntour has released an all-new version of their XCR Air fork for 24” kids bikes. For the new version, SR/Suntour switched from a single air/damper cartridge to a larger air chamber with a standard prefixed rebound lockout cartridge.  The negative spring has also been changed to a softer spring rate. As with the previous version, the current XCR Air has an alloy steerer and magnesium lowers for reduced weight. Compared to the previous model, the new fork is more sensitive and better tuned for the low air pressures needed for smaller riders. The larger air volume reduces end of stroke ramp up to allow lighter riders to more easily access the fork’s 80mm of available travel.

Fork Specifications:

Retail Street Price:                                         About $170 to $180
Fork Travel:                                                    63mm or 80mm (80 mm tested)
Axle:                                                                9mm Quick Release
Brake Mount:                                                 Disc only
Fork Weight (with uncut steerer tube):       1832 g
Crown to axle measurement:                      430mm

Test Rider:

Age: 10
Height: 4-foot 5-inches
Weight: 74 pounds
Years riding singletrack: 3

Ride Impressions (based on my son’s comments & my observations)

The new XCR Air fork has worked really well for my son. With the larger air chamber, the air spring curve is very linear allowing lighter riders to easily access all of the fork travel.  A more linear spring rate means that the firmness of the air spring remains relatively constant through the fork’s travel while a more progressive spring rate means that the air spring becomes firmer as the fork goes through its travel. At 45 psi in the air spring, the fork had a good balance of initial plushness on small bumps with a good level of mid stroke support.  At this air pressure, only large bumps bottomed out the fork. Typical riding on flat but slightly rocky trails uses only about ½ of the fork travel.

Other Comments:

One other reason why I decided to get the SR Suntour fork is that SR Suntour has a US distribution and service network. The other competitors in the kids air fork market (Spinner and RST) don’t. Availability of parts and warranty service from SR Suntour in the US seems good. 

Summary:

I like SR Suntour’s new XCR Air fork a lot. At a very reasonable price, it does everything I expect an air fork for a kids’ bike to do with great build quality. 

INTERBIKE 2015: Fat Bike & Plus-sized tires & wheels

To wrap up our Interbike 2015 coverage, here are some pictures and details about new fat bike & plus-sized tires, rims and wheels

New Plus-sized tires from Maxxis

Maxxis Rekon+ (left) & Ikon+ (right)

Maxxis Rekon+ (left) & Ikon+ (right)

WTB Plus-sized Tires & Rims

WTB Plus Sized tires SMALL.jpg

Trailblazer 2.8 (left, Bridger 3.0 (center), Trail Boss 3.0 (right)

new ASYM i29 (29mm internal width) & i35 (35mm internal width) rims along with the Scraper i45 Plus sized rim

Reynolds/Borealis Elite Carbon Fiber Wheels (80mm inner width)

Industry 9 Fat Bike Rims in Alloy & Carbon Fiber

i9 Big Rig Alloy

Velocity Dually Fat Bike Rims

Ryde Rims Plus-sized Rims

Ryde comes from the Netherlands and has been in business since 1908. They are seeking to enter the North American market.with their line of rims.

INTERBIKE 2015: Praxis Works

Some of Praxis Works' introductions at the Interbike 2015 show.

Wide-Narrow Chainring that fits Shimano's new 96 BCD cranks (M8000 XT & M9000 XTR). Shimano currently does not offer a wide-narrow tooth chainring

Wide-Narrow Chainring that fits Shimano's new 96 BCD cranks (M8000 XT & M9000 XTR). Shimano currently does not offer a wide-narrow tooth chainring

Praxis Works Wide Range 10 speed cassette

Praxis Works Wide Range 10 speed cassette

View of the back of the Praxis Works Wide Range 10 speed cassette

View of the back of the Praxis Works Wide Range 10 speed cassette

Crankset with M30 spindle that fits all bottom bracket standards

Crankset with M30 spindle that fits all bottom bracket standards

Praxis Works M30 Thru BB for Race Face Cinch and Rotor Cranks

Praxis Works M30 Thru BB for Race Face Cinch and Rotor Cranks


INTERBIKE 2015: New Rock Shox Lyrik fork

Rock Shox introduced their redesigned Lyrik fork at Eurobike in August. Compared to the Pike fork, the Lyrik provides longer travel options with 160/170/180mm travel options for 27.5" wheels and 150/160mm travel options for  29" wheels as well as an updated Charger damper.  The dropouts incorporate Rock Shox's new Torque Cap design that incorporate a larger contact area to the hub. Currenly only SRAM hubs will take advantage of the Torque Cap's claimed increase in stiffness, but SRAM is licensing the system out to other hub manufacturers.


Estimated difference in weight between a Lyrik and a Pike with the same amount of travel is 170 grams.